Frame Design and Fabrication
So you've decided to install a C5 Corvette IRS in your project vehicle. Great – and Thank You for selecting Dobbertin Performance as a big part of the upgrade!
Just to make sure everything goes smoothly, we're going to start with setting up the rear frame rails. Remember, we're always happy to hear from customers who might have a question – or a suggestion to improve our products, website or instructions.
At this point, the builder has already determined the proper width cradle (See Section 06 for more information) and has received the Corvette Interface Adapter Kit and Cradle.
As with nearly all rear end or suspension swaps, whether it’s a 4-link, ladder bar or fully-independent design, the modifications usually begin with the installation of a rear subframe. This is commonly referred to as back-halfing a frame and is a whole lot simpler than it may sound to the novice fabricator.
Installing a different frame in the rear of your project car is quite common and also one of the first steps in allowing the installation of wider tires, if you want to keep them within the confines of the original body lines. A vehicle's factory frame is usually too wide to accommodate much more than an inch or two wider tires.

Another reason for discarding the original rear section of the frame is really quite simple. Attempting to attach an after-market or upgraded suspension system to a car's nasty, twisting, turning factory frame can be a nightmare – especially when most frames these days are actually an integral part of its unibody construction.
There are plenty of companies that produce rear frame kits, which are pre-bent and ready to install. But you have to beware of the bends in the kits. Most of them will have more of a bend on the top rail, so the upper rail slopes down towards the rear of the car.
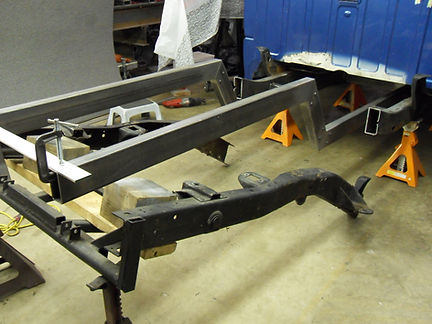
A typical new rear frame section
The frames for our adapters need to have equal bends at the upper and lower positions, so that the rails run parallel to each other and the ground. One option is to cut and weld the frame yourself,
or have a local fabrication shop do the job.

Cut and welded angles
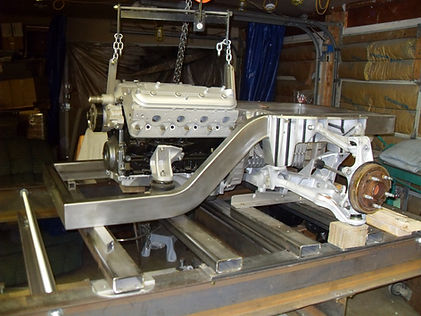
Custom formed angles
Another option is to order a custom formed frame, available from several manufacturers online. The custom formed frame rails can get a bit pricey – but the end result is a more 'finished' appearance.
Remember when ordering your rear frame kit that you only need the frame rails and not all of the other brackets for the 4-links, ladder bars, springs, shocks and panhard rod – because all of the suspension mounts are built right into our Corvette Interface Adapters.
If you want about 5-inches of ground clearance on your bottom frame rails, which is like a Corvette, then we recommend 2” x 4” tubing with equal-degree bends and a 12.5” Rise. This means that the bottom of the upper section is 12.5” higher than the bottom of the lower section. If you want 6-inches of ground clearance, then use an 11.5” rise. (Of course this all varies with tire size.)
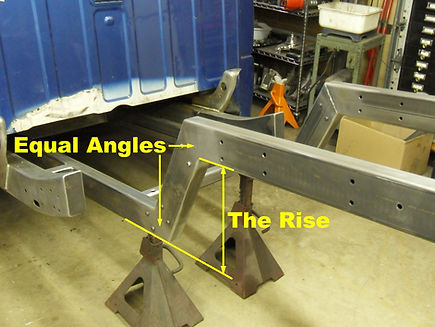
This may seem backwards, but look at it from the suspension's point of view. The height of the adapter channels on the suspension module, with Corvette sized wheels and tires, is right around 17.5" to 18" off the ground. Therefore, the longer the rise, (or drop, from this perspective) the closer the lower rails will be to the ground.
Another important consideration when designing your frame is plotting where the rise, (front to back) of the frame will be positioned.
I always rip-cut a few lengths of 1/2" plywood, 4" wide to make a complete mock-up of the rear frame rails before I start cutting any steel or aluminum.
As I mentioned in an earlier section, our Corvette Interface Adapter Kit will work just fine with either the C5 or C6 Cradles.
However, there is one critical difference that builders utilizing either the C5 or the C6 IRS should be aware of. In 2005, with the advent of the C6, Chevrolet lengthened the wheelbase 1.2" (From 104.5" to 105.7".)
They accomplished this with a little tweek in the rear suspension geometry. The lower control arms and their mounts were moved enough to relocate the rear spindle 1.2" rearward. This is important to remember, especially when designing your rear frame and locating your axle centerline within your rear wheel opening.
Please note in the photo below:
The 8.0" dimension is for the C5 and the 9.2" dimension is for the C6.
Once you have an accurate idea of where your rear axle centerline will be, the frame can be temporarily set into place.
A really good way to make sure that your frame will be correct is to buy a sheet of 1/2" plywood and cut it into 4" wide strips to make a full-scale frame. Going a step further, you can also buy a couple 8-foot 2x6 boards and screw them to the plywood for a true 2" x 4" plywood mock-up of your frame. Believe me, cutting the wood frame incorrectly is a whole lot cheaper than doing it in steel.
We recommend laying out the frame rails, (front to back) so that at least 1-inch of the top frame rail extends forward of the adapters. (9-inches in front of the axle centerline for a C5 and 10.2" for the C6.)
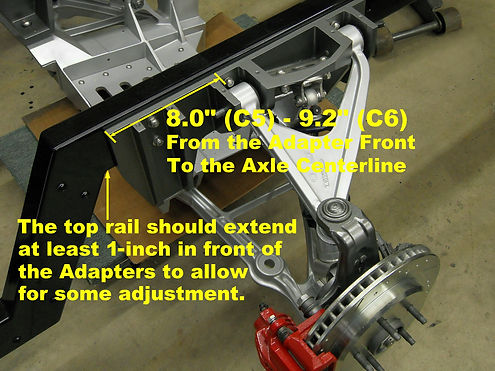
This way, if your axle centerline calculation is slightly off, or you want to shift the axle forward a little, there is still room to accomplish this.
Another thing to consider if you're building a mid engine Type 4 drivetrain is the width between the frame rails.
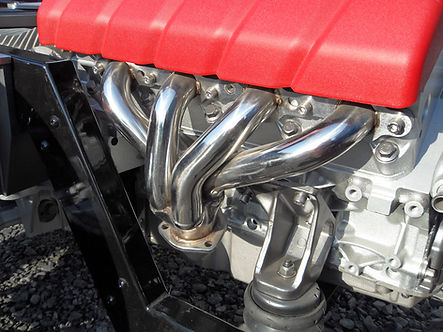
With our S-10 project, we didn't want to notch the frame, so we could only narrow the cradle a maximum of 6-inches. Then we had to go with cut and welded 60-degree angles to get the frame down quickly, so there was adequate clearance for the headers and the engine.
Of course with Types 1 - 3, or Type 4 with an adequate width, the formed frame rails can still be used.

Once the width and the location of the rise is determined, it's time to tack in the rear frame rails. Make sure that the vehicle's lower frame is level with the ground as well as the new frame rails.
At this point, I wouldn't recommend welding the frame rails in permanently. There still might be some minor adjustments to consider. Just make sure that the rails are supported firmly, so they can't shift around - either from side to side or up and down.
Pickup trucks are a breeze because the old frames can actually be used as a frame jig. With our S-10 project, the new frames were completely installed before we removed original frame.

